
Protecting your digital content has become essential in an era where documents are shared, downloaded, and forwarded within seconds. One of the simplest yet most effective ways to secure your files is through professional watermarking. This guide will show you exactly how to watermark documents using CamScanner, along with expert tips, best practices, and mistakes to avoid.
What Is Watermarking and Why It Matters
Understanding Digital Watermarking
Digital watermarking involves placing a subtle text or image over a document to show ownership, confidentiality, or brand identity. It helps protect sensitive files, maintain intellectual property rights, and establish professional credibility.
Why You Should Add Watermarks to Important Documents
A watermark acts like a digital seal. Whether you are sharing contracts, proposals, or creative work, a watermark ensures readers know the source of the content and discourages unauthorized distribution.
Types of Watermarks You Can Use
Text-Based Watermarks
These can include names, phrases such as “Confidential,” or company details. They are quick to apply and ideal for internal or sensitive documents.
Logo or Image Watermarks
Image watermarks use brand logos, seals, or semi-transparent graphics. They elevate branding while maintaining security.
Hybrid Watermarks
A combination of logo + text is common for businesses that want both brand visibility and protection.
Getting Started With CamScanner for Watermarking
Setting Up CamScanner
- Download CamScanner from the Google Play Store or Apple App Store.
- Create an account or sign in.
- The interface displays options like Scan, PDF files, Import, Edit, and Share—everything you need for watermarking.
Understanding the Interface Before You Begin
The clean and intuitive layout helps you scan documents, enhance them, and apply watermarks with ease. Familiarity with the editing tools will help you work more efficiently.
How to Add a Watermark in CamScanner: Step-by-Step Tutorial
1. Select or Scan Your Document
Before inserting a watermark, choose the final version of the document. CamScanner lets you import PDFs or scan new pages directly from your camera.
2. Choose Between Text and Image Watermarks
CamScanner provides flexible watermark options:
- Text Watermark: Ideal for quick confidentiality labels.
- Image Watermark: Perfect for logos or branding graphics.
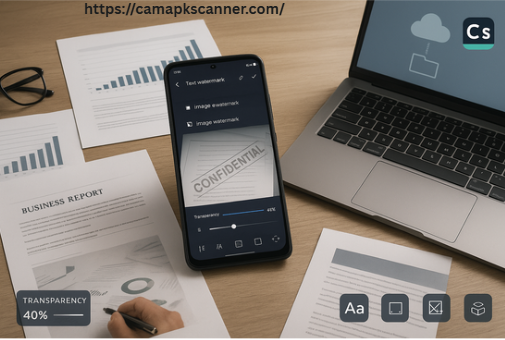
3. Customize the Watermark Design
You can fine-tune:
- Placement (center, corner, diagonal)
- Size and scaling
- Opacity/transparency
- Rotation
These settings help you create a watermark that is visible yet unobtrusive.
Professional Watermark Placement and Design Tips
Positioning Your Watermark for Maximum Effect
- Centered Watermark: More protective for full-page documents.
- Corner Watermark: Keeps the content clean while still marking ownership.
- Diagonal Watermark: Common for high-security files like contracts.
Ensuring Readability of the Document
Avoid bold, colorful, or dark watermarks that obscure text. Instead, use soft transparency (20–40%) to keep pages readable while reinforcing brand presence.
Best Practices for Clean, Professional Watermarks
Keep It Subtle yet Noticeable
The best watermarks protect without overwhelming. A soft, semi-transparent mark works best for reports and business files.
Maintain Branding Consistency
Use the same:
- Logo
- Text style
- Position
- Transparency level
Consistency builds trust and brand recognition across all documents.
Avoid Watermark Overuse
One clean watermark per page is enough. Multiple layers or patterns make documents look cluttered and unprofessional.
Advanced CamScanner Watermarking Tips
Batch Watermarking for Time Efficiency
CamScanner allows you to apply a single watermark style to multiple pages or entire PDF batches. This is ideal for large projects or team workflows.
Enhance Confidentiality with Dual Protection
For sensitive records, pair your watermark with:
- PDF password protection
- Restricted sharing settings
This adds a stronger layer of security.
Cloud Integration for Secure Storage
CamScanner supports Google Drive, Dropbox, OneDrive, and more. Uploading watermarked files ensures:
- Easy access
- Safe backups
- Seamless sharing
Common Watermarking Mistakes to Avoid
Using Overly Large Watermarks
Huge watermarks distract from the content and look unprofessional. Always scale proportionally.
Placing Watermarks Over Important Text
Avoid placing watermarks directly on key tables, paragraphs, or signatures. Use transparency or shift positioning to preserve clarity.
Not Optimizing for Mobile Viewing
Since many users view documents on mobile screens, ensure your watermark remains visible but not overwhelming on smaller displays.
Conclusion
Watermarking your documents with CamScanner is one of the simplest ways to secure your work and maintain professional presentation. By customizing opacity, position, and design elements—and following best practices—you can create elegant, effective watermarks that prevent misuse while enhancing brand identity. Whether you’re a business owner, freelancer, or student, mastering CamScanner watermarking will elevate the security and professionalism of your digital documents.
FAQs
1. Can I remove a watermark added in CamScanner?
Only if you still have the original unwatermarked file. Once embedded, a watermark cannot be removed.
2. Are watermarks enough to stop copying?
They deter casual misuse but are not foolproof. Combining watermarks with passwords is more secure.
3. Can I watermark multiple pages at once?
Yes. CamScanner supports batch watermarking for multi-page PDFs or entire document sets.
4. Should every page have a watermark?
For consistency and strong protection—yes, watermark each page.
5. Can I customize the appearance of my watermark?
Absolutely. You can edit font, color, transparency, size, and placement for branded or professional styling.