
Scanning documents has become a normal part of both work and personal life. Whether you’re digitizing receipts, contracts, or handwritten notes, scan clarity makes a huge difference. CamScanner offers a set of smart tools that help produce crisp, readable, and professional-quality scans. This guide explains how to enhance scan quality using cropping, filters, lighting, resolution settings, and more.
Introduction: Why Scan Quality Matters
Imagine trying to read a blurred contract or a poorly scanned receipt. It’s frustrating and time-consuming. High-quality scans reduce errors, improve text recognition, and make sharing or printing documents much easier. Let’s explore practical steps to capture clean, accurate scans every time.
Understanding CamScanner’s Core Features
CamScanner is more than a simple mobile scanning app. Its built-in tools can significantly improve your workflow — if you know how to use them effectively.
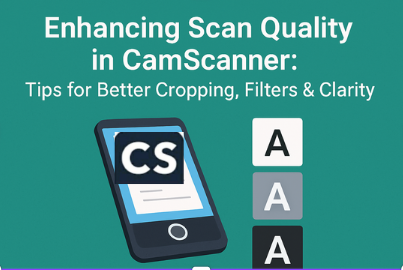
Automatic Cropping and Edge Detection
The app automatically detects document edges and crops accordingly. While convenient, irregular shapes or folded papers may require manual edits for perfect alignment.
Filters for Document Enhancement
CamScanner’s filters help enhance clarity by brightening text, improving contrast, and removing shadows. Choosing the right filter ensures your scans are visually sharp.
OCR (Optical Character Recognition) Basics
OCR turns your scanned images into editable and searchable text. Better scan quality equals better OCR accuracy.
Preparing Documents for Scanning
Proper setup is the foundation of a clear, professional scan.
Choosing the Right Surface and Lighting
Place documents on a flat, well-lit surface. Natural daylight works best, while soft LED lighting is ideal indoors. Avoid uneven lighting, glare, or harsh shadows.
Handling Different Paper Types
Thin, glossy, or textured papers may need extra care. Ensure the document is flat and adjust brightness or contrast if the paper texture affects scan clarity.
Tips for Better Cropping
Cropping plays a major role in how clean your scan looks.
Manual vs Automatic Cropping
Automatic cropping saves time, but manual cropping gives you control over odd shapes or folded edges. Always double-check your crop lines.
Adjusting Edges Precisely
Zoom into edges and align corners using the adjustment handles. This avoids distorted borders and improves OCR performance.
Optimizing Filters for Clarity
Filters act like digital lenses for your scanned documents.
Understanding Filter Types
CamScanner offers filters such as:
- Original – keeps natural colors
- Lighten – brightens faint handwriting
- Magic Color – enhances contrast and clarity
- B&W – best for text-heavy documents
Choosing the Right Filter for Your Document
Use Lighten for handwritten notes. For printed documents or contracts, Magic Color or B&W often produces the sharpest result.
Improving Scan Resolution and Sharpness
Clear resolution ensures every detail is captured accurately.
Using High-Resolution Scanning Options
Always choose the highest resolution available. Higher DPI captures small text, fine lines, and important details clearly.
Reducing Blurriness and Shadows
Hold your phone steady or use a stand. Adjust your light source to eliminate shadows and reduce edge blur.
Organizing and Saving Scans Efficiently
A clean, organized digital library makes your documents easy to find and share.
Naming and Tagging Documents
Use descriptive names such as Invoice_June_2025 instead of generic names like “Scan1.”
Exporting Formats and Quality Settings
Choose PDF or JPEG depending on usage. Use high-quality settings for printing or OCR and smaller file sizes for quick sharing.
Advanced Tips for Professionals
Maximize productivity with CamScanner’s advanced capabilities.
Batch Scanning and Multi-Page Documents
The batch scanning tool lets you scan multiple pages quickly and combine them into one neatly organized PDF.
Combining OCR with Cloud Storage
Use OCR with cloud services like Google Drive, Dropbox, or CamScanner Cloud for searchable, backed-up documents accessible anytime.
Common Mistakes to Avoid
Avoiding these issues will dramatically improve your scan quality.
Overusing Filters
Applying too many filters can distort text and colors. Use filters only to improve readability — not to over-style the document.
Ignoring Lighting Conditions
Poor lighting results in shadows, blur, and unclear text. Always check your environment before scanning.
Conclusion
High-quality scans are easy to achieve with the right techniques. By preparing your document, adjusting cropping carefully, using the proper filters, and lighting your setup correctly, you can create crisp, professional, and workflow-ready scans. CamScanner’s powerful features make this process simple once you know how to use them effectively.
FAQs
- Can CamScanner scan both documents and photos?
Yes, it supports printed documents, handwriting, and photos. - Which filter is best for contracts?
B&W or Magic Color offers excellent clarity for text-based documents. - How do I improve OCR accuracy?
Use high-resolution scans, good lighting, and precise cropping. - Can I batch scan multiple pages?
Yes, CamScanner supports multi-page batch scanning. - Does CamScanner support cloud storage?
Yes, it integrates with Google Drive, Dropbox, and CamScanner Cloud.