
Scanning books can be frustrating when curved pages distort the text and ruin the quality of the final document. Warped edges, shadows, and spine curvature can interfere with readability and reduce OCR (Optical Character Recognition) accuracy. In this upgraded guide, you’ll learn how to scan books without curved pages using CamScanner, along with practical techniques, setup tips, and correction tools that ensure crisp, professional-quality results every time.
Understanding the Problem of Curved Pages
Why Curved Pages Occur in Book Scanning
Book pages naturally bend toward the spine because of the binding. This curvature becomes more pronounced in thick or tightly bound books, especially hardcovers. Simply placing a camera straight above the pages rarely results in a flat and distortion-free image.
How Curved Pages Affect OCR and Readability
Curved pages lead to:
- Warped or wavy text near the spine
- Shadows that darken text
- Misinterpretation of letters by OCR tools
- Unprofessional or unclear exported documents
To ensure high-quality, clean, and searchable digital files, pages must be as flat and evenly lit as possible before scanning.
Preparing Your Setup for Distortion-Free Book Scans
Choosing the Right Book to Scan
Some books are naturally easier to scan:
- Easiest: Softcovers, thin paperbacks, flexible bindings
- Challenging: Thick hardcovers, textbooks, art books
Understanding the book type helps you prepare the right scanning method.
Setting Up an Ideal Scanning Environment
A good setup dramatically improves scanning results.
Lighting Tips for Clear Scans
Proper lighting reduces shadows and emphasizes text clarity:
- Use even, diffused lighting
- Prefer natural daylight or soft lamps
- Avoid harsh directional light that creates visible shadows in the inner margins
Flat Surface vs. V-Shaped Book Cradle
Both setups work, but each has its use:
- Flat Surface: Suitable for small or flexible books
- Book Cradle: Best for thick or heavy books, reduces spine pressure, and helps flatten pages naturally
Tools and Accessories That Help Flatten Book Pages
Using Book Holders or Page Clamps
Gentle book holders keep pages open and aligned without damaging the spine. They help maintain page stability, especially when scanning multiple pages.
Weight-Based Flattening Techniques
Placing a lightweight, smooth object—such as a soft book weight or paperweight—helps reduce curvature:
- Only apply light pressure
- Avoid sharp or heavy items that may crease or tear pages
CamScanner Tools That Straighten Curved Pages Automatically
CamScanner offers several intelligent features that help correct distortions digitally.
Smart Edge Detection and Auto-Crop
CamScanner automatically identifies document edges, removes the background, and frames pages neatly, giving your scan a professional finish.
Perspective Correction for Tilted or Curved Pages
This feature straightens slightly curved or angled lines so text appears flat and easy to read. It’s especially useful for pages where minor spine curvature remains.
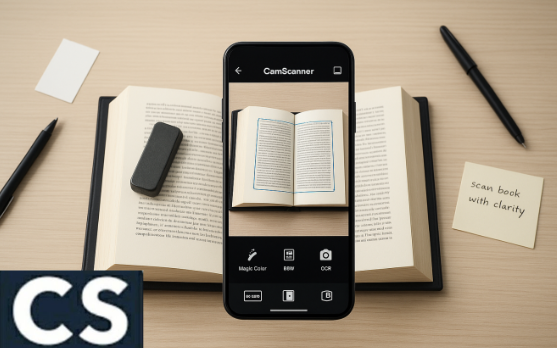
Filters That Improve Clarity
CamScanner’s enhancement filters—like Magic Color, B&W, and Gray Mode—remove shadows, sharpen text, and improve contrast, making slight curves far less noticeable.
Step-by-Step: How to Scan Books Without Curved Pages in CamScanner
Step 1: Properly Position the Book
Place the book on a stable surface or cradle. Flatten the pages as much as possible using hands, a weight, or holders to reduce spine curvature.
Step 2: Capture a High-Quality Image
Open CamScanner and hold your phone directly above the page:
- Keep the camera parallel to the surface
- Ensure the entire page is within the frame
- Stay steady to avoid motion blur
Step 3: Adjust and Enhance the Scan
After capturing:
- Allow auto-crop to frame the page
- Use perspective correction if needed
- Apply filters for sharper text and reduced shadows
- Adjust brightness or contrast manually for optimal clarity
Step 4: Export Your Digital Copy
Once the pages look clear and straight:
- Export as PDF, JPG, or OCR text
- Use CamScanner’s batch export for large volumes or multi-page books
Advanced Techniques for Scanning Thick or Large Books
Scan One Page at a Time
For heavy books with deep curvature near the spine, scan each page individually rather than both at once. This minimizes text distortion and creates sharper results.
Post-Processing Improvements
If curves remain visible:
- Use tools like Adobe Acrobat, Photoshop, or GIMP
- Apply warp fixers, straightening tools, and shadow removal features
These refinements give professional, archival-grade results.
Common Mistakes to Avoid When Scanning Books
Avoid these scanning errors to save time and get consistently clean pages:
- Depending only on auto-correction: Physical flattening is still essential for thick books.
- Ignoring proper lighting: Poor lighting produces shadows, regardless of correction filters.
- Capturing at an angle: Always hold your device directly above the page.
- Scanning while moving: Motion blur ruins text clarity and OCR accuracy.
Conclusion: Create Flattened, Professional Book Scans with Ease
By combining proper preparation, physical flattening techniques, and CamScanner’s smart correction tools, you can completely eliminate curved-page distortions. With the right environment and careful scanning practices, even thick or tightly bound books can be digitized cleanly, producing sharp, searchable, and professional-quality digital documents.
FAQs About Scanning Books Without Curved Pages
1. Can CamScanner completely flatten curved pages?
CamScanner can correct minor curves, but severe curvature requires physical flattening first.
2. Which types of books are easiest to scan?
Softcovers and thin paperbacks with flexible spines are the easiest and produce the flattest pages.
3. Do I need special lighting for book scanning?
Yes. Even, diffused lighting dramatically improves clarity and eliminates shadows.
4. Can I scan multiple pages at once?
You can, but scanning one page at a time improves accuracy and reduces distortions.
5. Are there alternatives to CamScanner for straightening pages?
Yes—Adobe Scan, Microsoft Lens, and dedicated book scanners also offer perspective correction and image enhancement tools.